Assets & import
Every texture, mesh, material, prefab, and scene in your game lives in the project as an asset file. The Assets panel is where you browse, create, import, and re-import those files; the Inspector is where you tune the per-asset import settings. This page covers how assets get into the project, how they are converted, and how references between them stay stable.
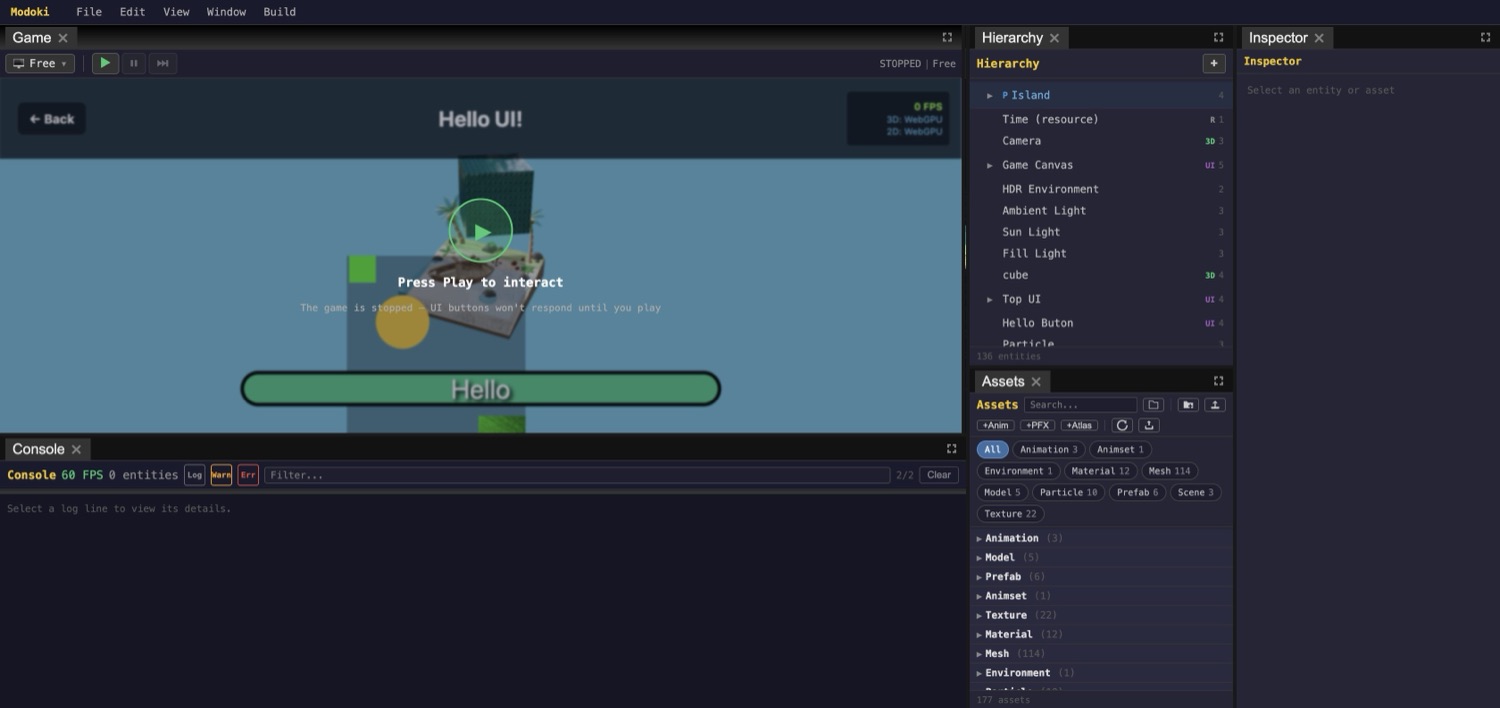
The Assets panel browses the project; single-click an asset to inspect it, double-click to open its dedicated editor.
The Assets panel
The Assets panel is your project asset browser. Its toolbar gives you:
- Search and a view toggle to switch between category and folder views.
- A Type filter menu to narrow the list to specific asset types.
- New Folder (⇧⌘N) to add structure.
- Import files… to copy external files into the project.
- Refresh to rescan the project folder.
- Re-import all assets to regenerate the converted texture/model variants.
To create a new asset — a scene, material, animation clip, animset, sprite animation, 2D rig, particle effect, or sprite atlas — right-click a folder (or the Assets header) and pick from the context menu (Create Scene, Create Material, Create Animation, and so on).
The Type filter menu narrows what the panel shows; check the types you want. The available types depend on what your project contains — scene, prefab, model, mesh, material, texture, sprite, atlas, animation, animset, particle, and more. Single-click an asset to inspect it in the Inspector; double-click to open its dedicated editor — for example the animation clip editor or the particle effect editor. (A texture's sprite slicer opens from the Sprite Editor button in its Inspector, not by double-clicking.)
References are GUIDs, not paths
Every reference stored in a scene, material, or mesh — a mesh, a material, a texture, and so on — is a stable GUID, resolved to a path at load time through the asset manifest. References are never literal file paths. This means you can freely move or rename a file: the manifest updates and every reference keeps resolving.
TIP
Because references are GUIDs, reorganizing folders or renaming an asset never breaks the scenes and materials that point at it. Reorganize freely.
Importing a texture
Textures use a Unity-style, per-texture import flow. The import settings live in a .meta.json sidecar next to the source file, and the converted variant — not the source PNG — is what ships with your game.
- Bring the file in — click Import files… in the Assets panel toolbar and pick your PNG or JPG. It is copied into the project.
- Select it — single-click the texture so its import settings appear in the Inspector.
- Choose a texture type — pick 3D (model / material, the default), 2D (sprite / atlas), or UI (DOM image). The type sets sensible codec defaults; the exact output format and tuning live under Advanced.
- Fine-tune under Advanced — the output Format (3D offers
ktx2-uastc(default),ktx2-etc1s,ktx2-astc; 2D offersktx2-uastc,webp,png; UI iswebp/png), plus Max Size, Generate Mipmaps, Wrap S / Wrap T (repeat / clamp / mirror), and Colorspace (sRGB / Linear). - Apply — click Apply to run the conversion and reload (the button reads Re-import once converted). The converted variant now ships in place of the source.
Prerequisite
KTX2 formats (ktx2-uastc, ktx2-etc1s, ktx2-astc) require the KTX-Software toktx CLI on your PATH. Without it, KTX2 conversion can't run.
Importing a model
Select a model (a GLB) to open the Model import Inspector. It exposes LOD and encoder settings plus an Import button. Importing bakes the GLB into .mesh.json + .mat.json + textures, and writes a .prefab.json that you can drop straight into a scene.
Editing materials
A material is a .mat.json file. Pick a Shader (for example, Standard), then edit three sections:
- Surface — Color, Roughness, Metalness, Transparent, Opacity, Side, Alpha Test, Env Intensity, Flip Y, Flat Shading, Wireframe, Vertex Colors.
- Emission — Emissive color, Emissive Intensity.
- Maps — Tiling (X / Y), Base Color, Alpha, Normal (+ scale), Bump (+ scale), Roughness, Metalness, Emissive, Ambient Occlusion (+ intensity), Light Map (+ intensity), Displacement (+ scale / bias), Environment (equirect).
Each map is a GUID texture reference, so swapping a texture is just pointing the map at a different asset.
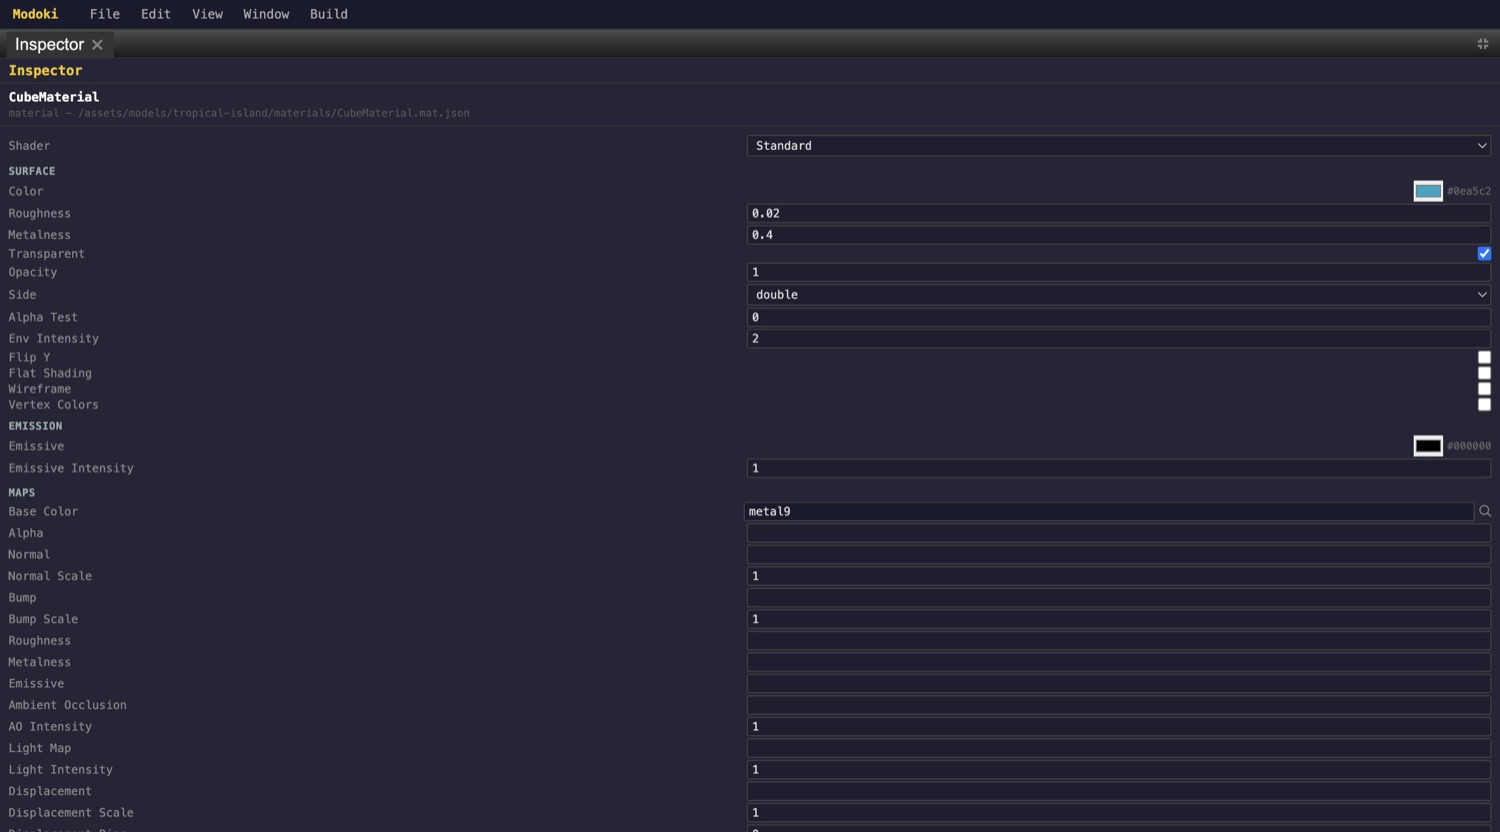
A .mat.json material: shader choice plus Surface, Emission, and Maps sections. Texture maps are referenced by GUID.
Re-importing
Conversion is not a one-time step. When you change a texture or model's import settings, or replace a source file, regenerate the converted variants:
- Use the Assets panel's Re-import all assets to regenerate everything.
- Or right-click a single asset and choose Re-import to regenerate just that one.
Note
The shipped variant is the converted output, not the original source file — re-import after changing import settings or replacing a source file.
Next: Animation & curve editor →